How to Use RingPlan Fax
Using RingPlan Fax
Below you will find instructions for locating and using your fax service.
RingPlan makes faxing relevant again by incorporating your mobile devices.
Send and Receive on Any Device
RingPlan Fax runs on RingPlan’s cloud-based platform. This makes your fax accessible from any web-connected device. Use your computer or mobile device to log into your account at my.ringplan.com.
1. Login to Your Portal
If you have previously created an account, simply log into my.ringplan.com to get started. If you have not created an account, create an account first.
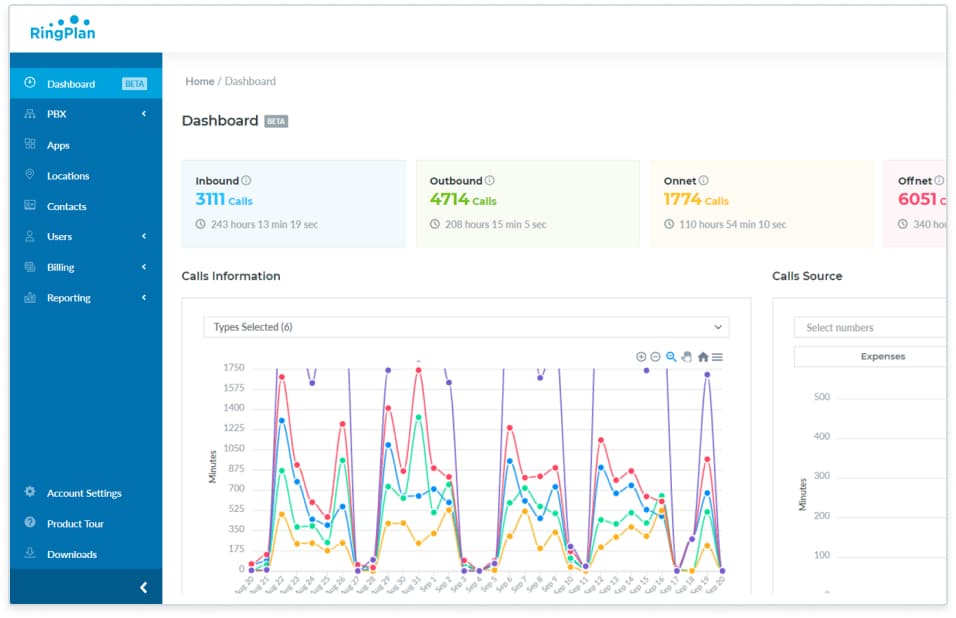
2. Select or add telephone number(s) that will be used for faxing
On the left side menu bar, clickPBXthen clickNumbers
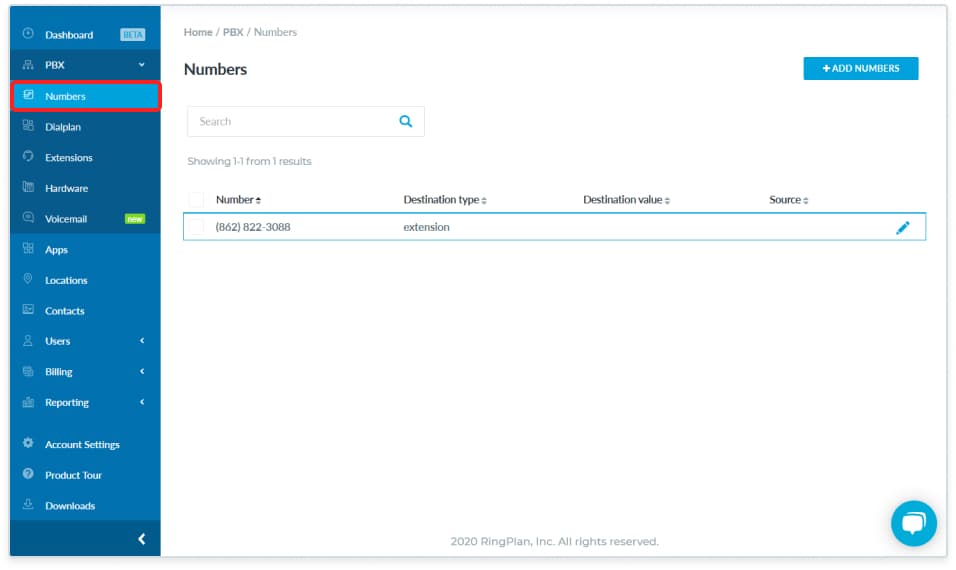
3. If your fax number appears in the list, check it’s destination
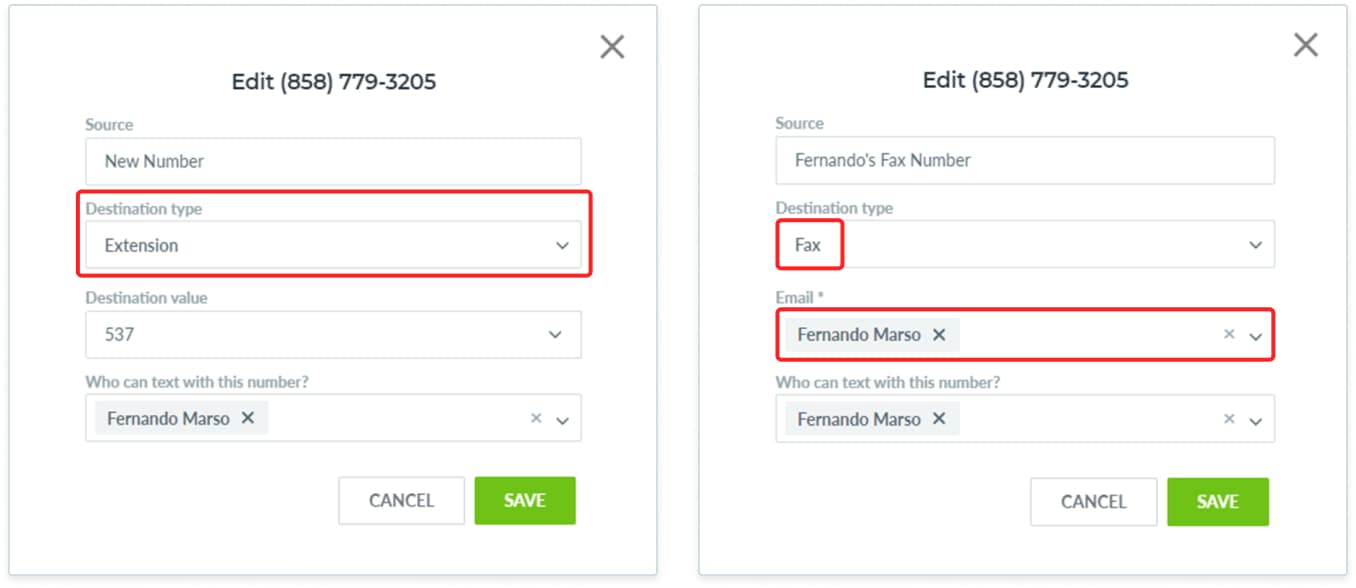
The destination should say “fax”. If it doesn’t, edit the number (hover your mouse over the number and click on the pencil tool) and change the destination to fax. Also select which email address(es) the fax will be going to.
4. If you don’t have any available numbers for fax, you can add one easily
On the numbers page, click theAdd Numbersbutton to easily order and receive a number to be used for faxing.

5. Visit Your Apps
From anywhere within your portal, you will have access to your left-hand navigation. From here, click onAppsto see all the apps available under your current subscription.
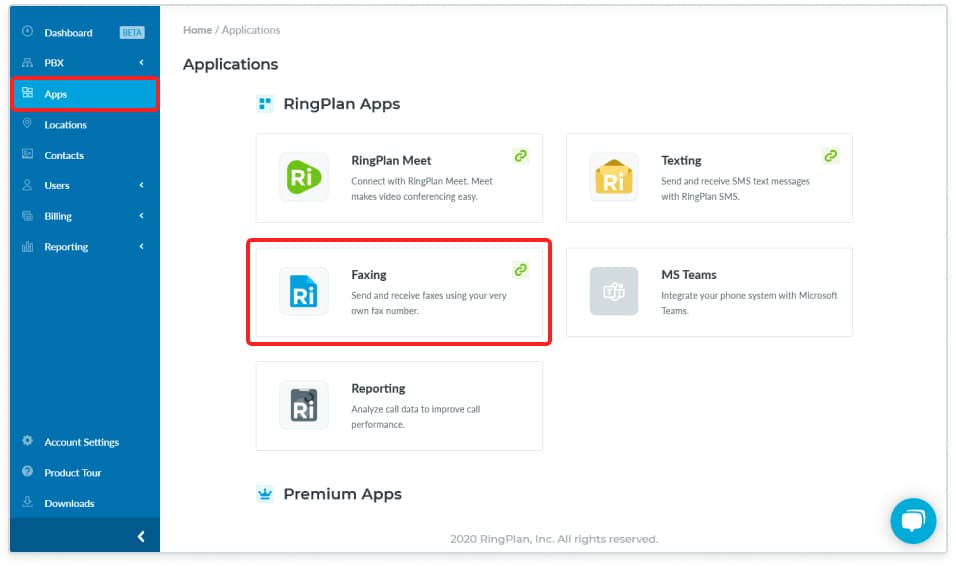
6. Click on Fax
From your application page, click on Faxing to access your fax messaging center.
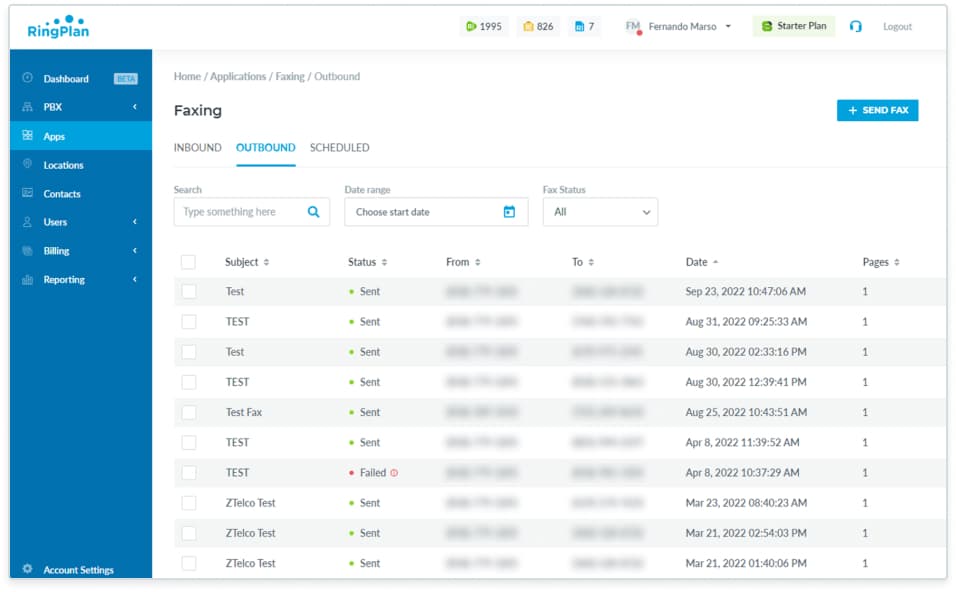
7. Click onSend Fax
Start a new fax by clicking onSend Fax
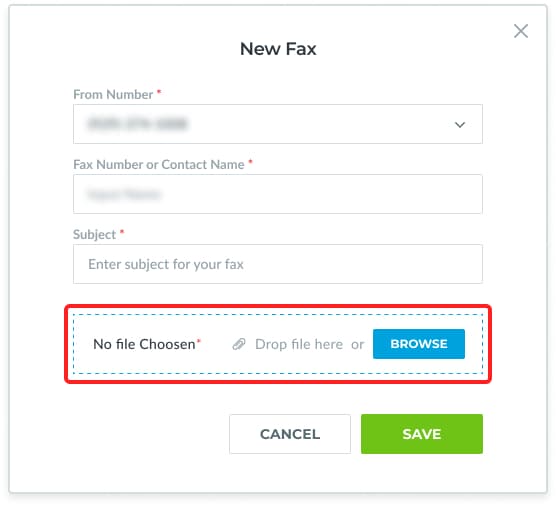
8. Setup a Fax
To create a new fax, enter the fax recipient number and choose aFrom Numberto choose from your library of numbers. Click onBrowseto add a file.
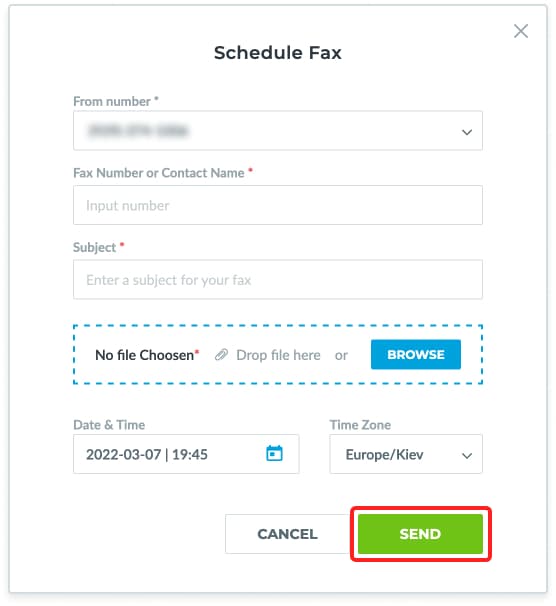
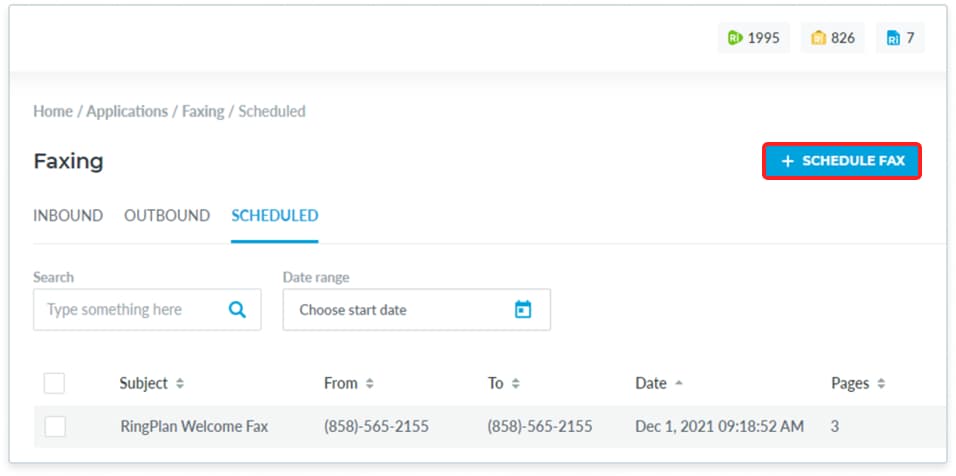
9. Schedule Your Fax
Click onSchedule Faxto schedule your fax by date and time.
10. Click on SCHEDULE
Send your fax by clicking onSEND
